International Seed Shipping Update
Learn how to start your seeds
Home Blog Seed Starting Lessons I Learned the Hard Way
February 23rd 2017

Seed Starting Lessons I Learned the Hard Way

Written by
Floret

Starting your own seeds can be intimidating for new gardeners, but once you get the hang of it, there’s nothing to fear. One of my goals here on the blog is to provide you with the best information, to help you grow great flowers and hopefully dispel the notion that success is only possible for professionals.

In addition to some of the tips I’m sharing today, I want to make sure you know about a couple other sources of info here on the Floret site:

-In the Floret Resources section, I have created a little Starting Seeds 101 tutorial and photo essay (be sure to click the arrows to advance the images) with some of the basics.

-Here on the blog, you’ll find a post covering Seed Starting Basics.

-In the Floret Shop, I’ve included sowing and growing instructions for dozens of my favorite flowers.

Floret_Seed Starting 101-7There’s nothing I hate more than seeing trays of beautiful little baby flowers go downhill before my eyes because I overwatered, underwatered, or got too excited about transplanting and didn’t properly harden them off. Seriously, I’ve found some pretty lame ways to waste expensive seed and lots of creative ways to kill baby plants over the years. Learning the hard way isn’t the most fun way to start seeds, so hopefully you can avoid making these same mistakes.

I’ve put together a little list of some Do’s and Don’t when it comes to seed starting. This list of quick tips is meant to complement other resources I’ve already created, plus help you learn from some of my greatest seed starting blunders.

Floret_Seed Starting 101-4DO tamp down the soil into your containers or cell packs. Then pack it down a teeny bit more. By pressing down on the soil, you not only eliminate air pockets that little rootlets don’t like, but you also make it so much easier to remove your baby plants once they are ready to transplant.   I remember mangling a whole mess of baby snapdragons because I had been sloppy about filling the flats with the soil. When it came time to transplant, instead of popping the plants out with a nice solid chunk of soil attached, the soil separated from the roots and I ended up with a crumbly mess and traumatized plants.  

Floret_Seed Starting 101-4
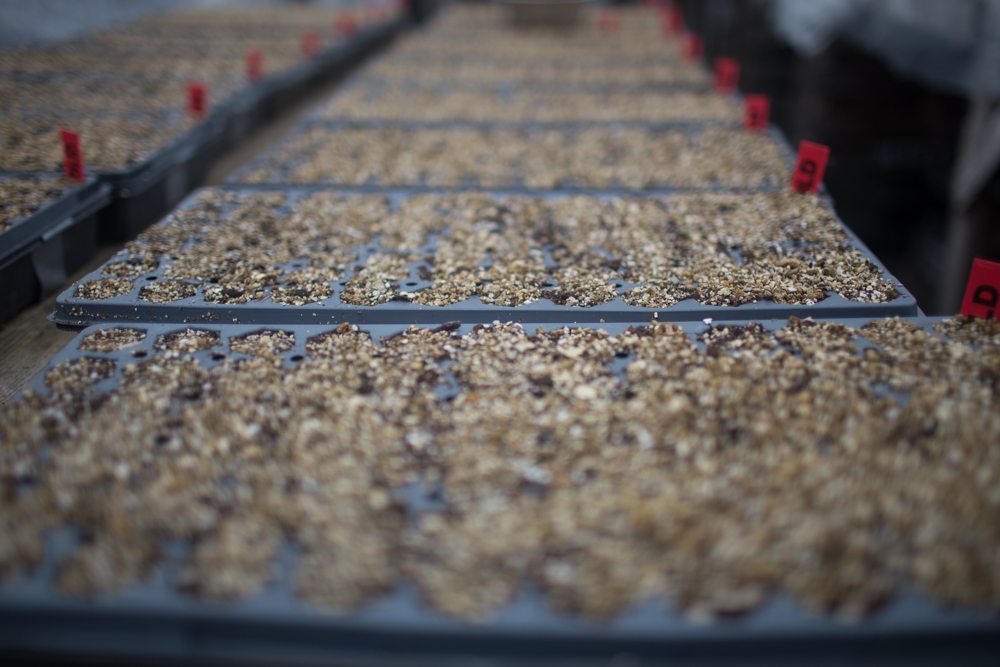
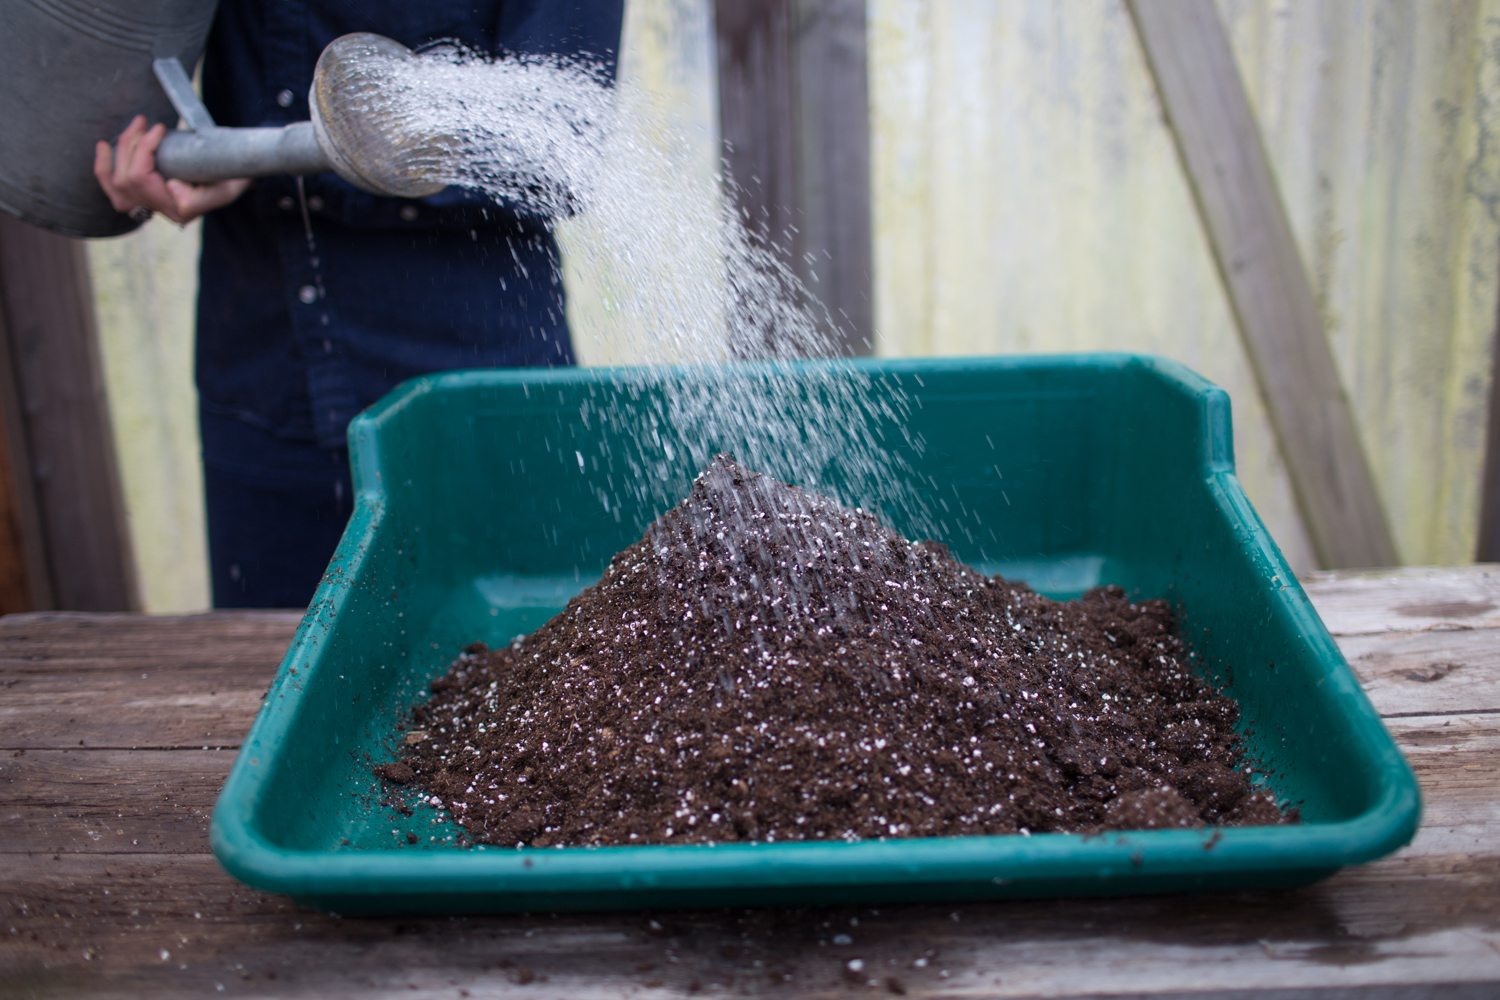
DON’T forget to moisten the seed starting mix prior to adding your seeds. If you add your seeds to dry potting mix and then try to overhead water, there’s a pretty good chance you’ll send your seeds floating to the corners of the container. If they are really tiny like Iceland poppies or snapdragons, you’ll probably wash them away and have to start over.

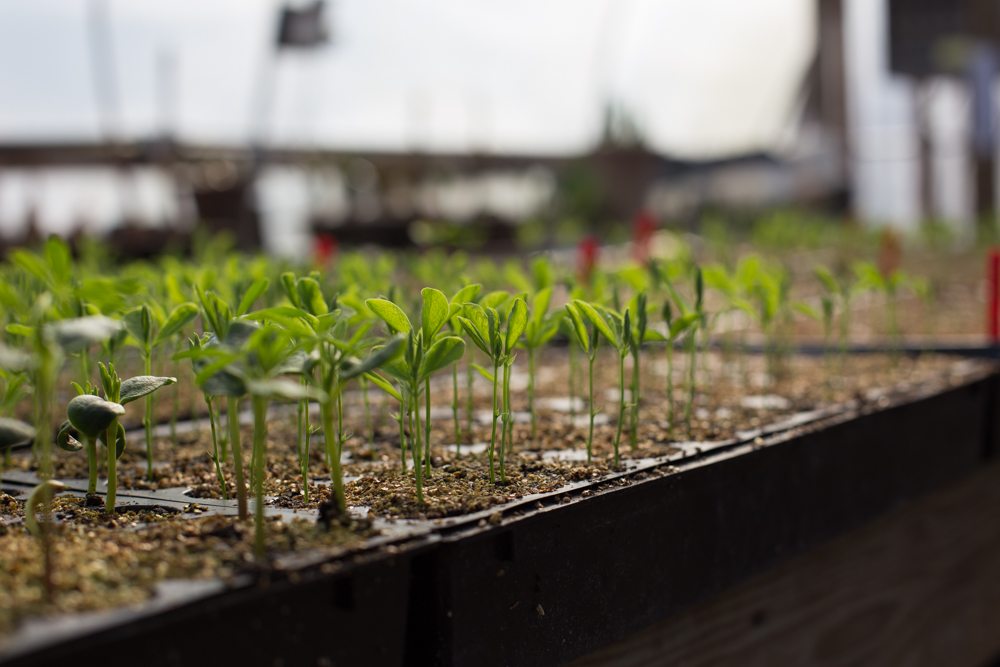
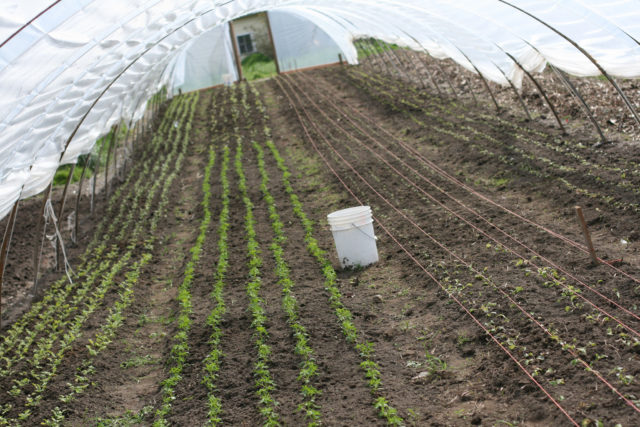
DON’T start your seeds too early. In the rush to get growing, it is easy to fall into the trap of starting all your seeds all at once. If you read the seed packets or catalog descriptions, you’ll note that it is recommended to start some slow-growing flowers earlier (10-12 weeks before your last frost) than others (4-6 weeks). If your frost-free date isn’t until mid-May, for example, you’ll want to start your foxglove now, but hold off on fast-growing, heat loving zinnias until later. One year I totally jumped the gun and planted zinnias way too soon and I had plants busting out of their pots, becoming root bound because they had no where to go. They were ready to be transplanted outside, but the spring frosts hadn’t yet passed, so I had to throw them all away.

Floret Seed Starting Heat Mats-2
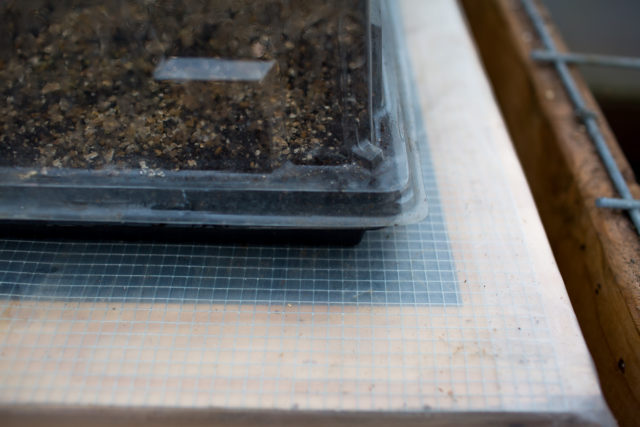
DO use bottom heat to get your seeds started. It is amazing how much faster and how much better seeds germinate with a little heat at their feet. Propagation mats work great for this. If you are a home gardener or small scale flower farmer you can get by with just one or two mats. Leave your seed starting trays on the heat mat only until they germinate. Once sprouted, move the tray off the heat and make room for the next seed starting tray(s).

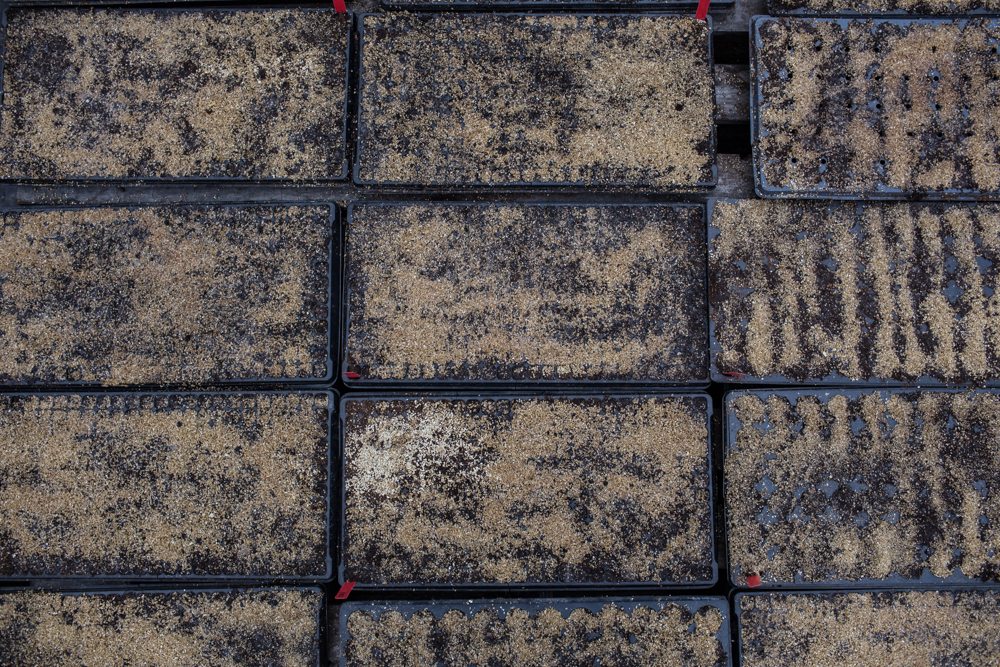
DON’T seed more than one type of flower in the tray, especially if you plan to use a humidity dome. Germination rates vary by variety so it is best to have all the cells filled with the same flowers, that way you won’t be forced to remove the dome too soon for a row of early germinators or too late for those slow to germinate. Plus, having variable plant heights in the same tray makes adjusting the height of the lights over the trays difficult (shorter plants within the tray can get leggy when light is adjusted for the taller plants).

Floret_Seed Starting 101-15DO remove the plastic humidity dome after your seeds germinate. Domes are really only used on the trays until the seeds germinate, which for some varieties may be as few as a few days. Once your plants have popped up, they need lots of air and light. Left on too long, domes can kill seedlings. Note: some gardeners recommend “weaning” their trays from a humidity dome by propping the dome open for a day or two before fully removing it. Similar to the process of hardening off more mature plants, this gradual acclimation to the heat and humidity outside the dome can reduce plant shock.

Floret_Seed Starting 101-12
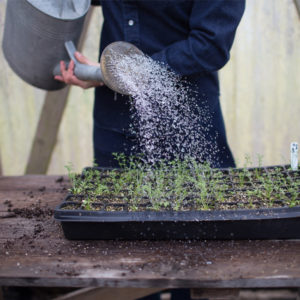
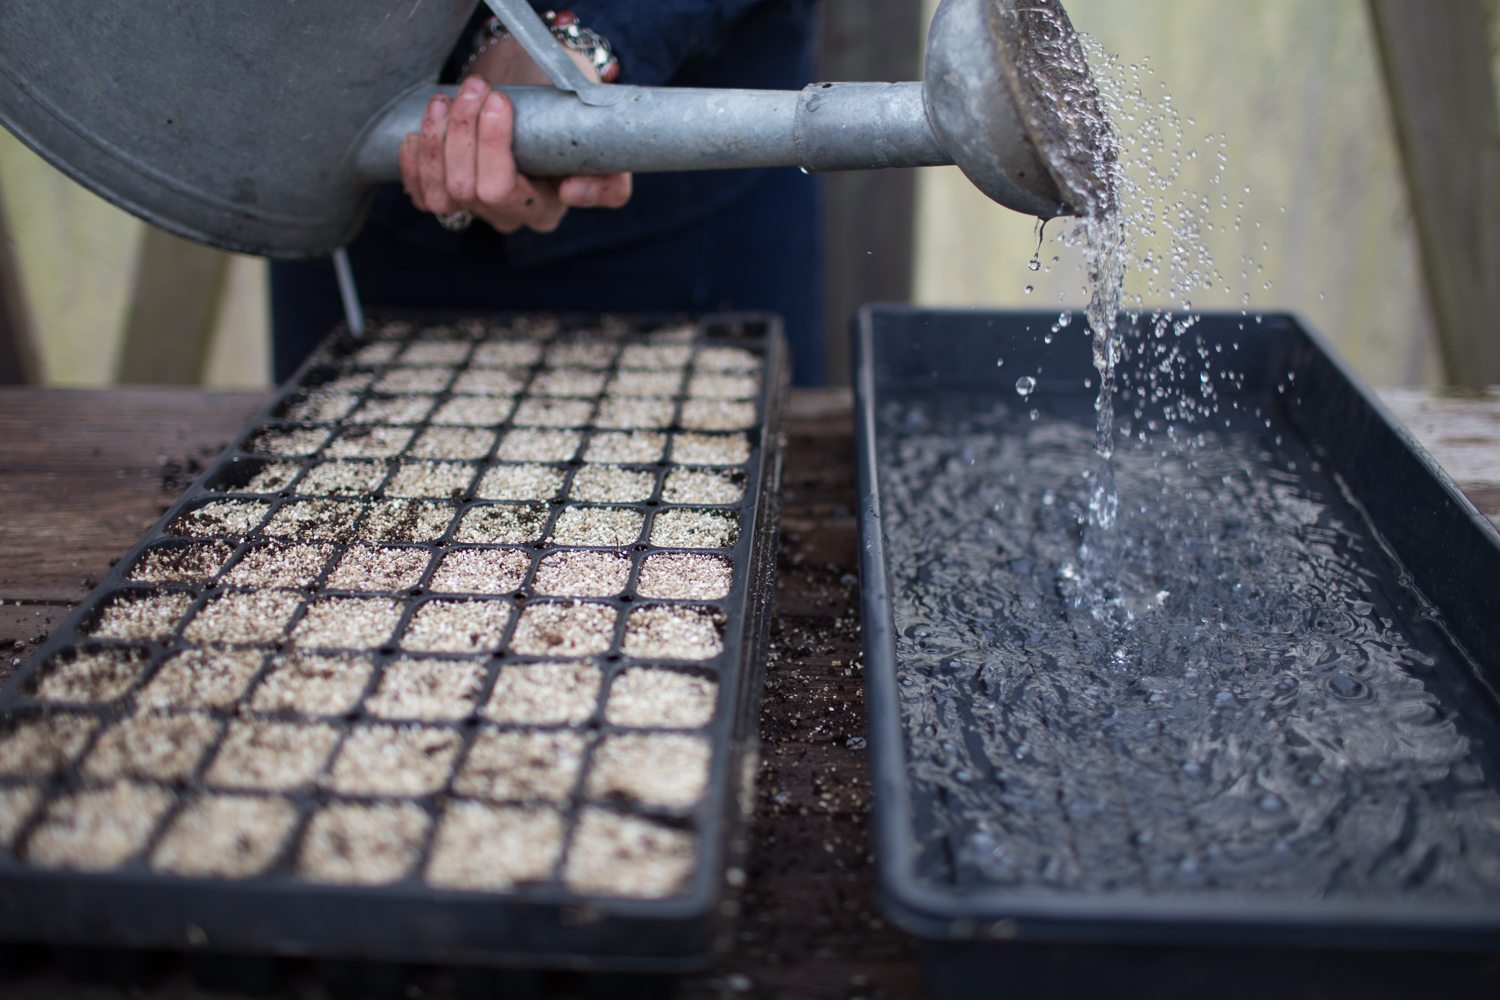
DO water your plants from the bottom when possible. Standard seed starting sets contain three pieces: a humidity dome, a cell pack layer with drainage holes, and a tray that serves as a liner for the cell packs. By nesting your cell packs (or whatever container you choose to use) in the waterproof tray, you can then add water to the tray which allows the soil to essentially siphon or wick up the water. This keeps water off of your leaves, helps prevent problems with fungus and disease, plus it focuses water where it is needed most, at the root level.

DON’T underestimate the amount of light tiny plants need to grow. If you use grow lights, be sure to adjust them so that they are no more than three inches above the tops of your plants. When I was a newbie, this was not intuitive to me. At all! As a result, I grew lots of gangly, leggy plants because they weren’t getting enough light.The bulbs were simply too far away from the foliage canopy. Once I realized my mistake, I adjusted the lights to about an inch or so above the top of the leaves (it seems really close, but trust me this is better for the plant). Once I had the lights adjusted, I found that the plants grew so much better, with nice strong stems.

8145203143_daf7dcb159_kDO “harden off” your plants before you transplant them. I am embarrassed to admit just how many plants I fried because I didn’t do this key step. In my excitement to transplant my baby plants into the field, I didn’t give them any chance to acclimate to their new outside environment. “Hardening off” is simply a process of allowing your plants time to gradually adjust to their new environment.

Think about it: your little plants have been in a warm and cozy, temperature-controlled environment for weeks, or months. If you suddenly take them from that space and expose them to bright sun, wind and temperature swings in the open garden, it is stressful to the plant. This step often requires lots of moving plants around, but trust me, transplant shock is real and deadly and taking the time and effort to allow your starts to adjust will make for happier, stronger plants and more flowers.

Floret_Seed Starting 101-2DON’T beat yourself up if you make mistakes.  Unless you are super lucky or already have a magical green thumb, you’re probably going to make a few mistakes your first time time starting seeds. $#!+ happens. And it’s ok! You’re sure to make far fewer mistakes than I did during the early days, but just know that goofing up is inevitable. That is part of the joy in gardening is learning what systems work well for your situation, your climate.

Have you made any of these same mistakes?  Or do you have any seed starting lessons you learned the hard way? I’d love to hear about them in the comments below.

102 Comments

  1. Rose on

    Our grow lights tell us to move them to about 18 inches above the plants. Not too sure if this is to far away?

    Reply
  2. Andrew Carso on

    I prefer using those little single cup coffee plastic pod things. Cut tiny slits in the bottom to allow you to set the soil filled pods in something like a cookie sheet with a raised lip on the sides to let you water them from the bottom up. You can also place a nice heating mat under the cookie sheet, they are perfectly sized for each other! Egg cartons are a bit too small, and I like being able to move the plastic pods independently of one other.

    Reply
  3. Andrew Carso on

    I would wet your seedlings, use something like a popsicle stick to loosen around the edges of the plastic cell, ease the new seedling out, add a bit of soil to the bottom of the cell, then gently place the seedling back inside. Always use very light airy seed starting mix, as the tiny new roots have a hard time forcing their way through regular potting soil.

    Reply
  4. Shaz on

    If you only use 5 cells out the 25 cells in a seed germination starter kit in a dome Can you use the unused cells and re soak in bacto at a future point or is the remainder wasted ?

    Reply
  5. Shaelynn on

    I didn’t put enough soil in my trays. My seedlings just sprouted, should I add more?

    Reply
  6. kate on

    is it okay to use egg cartons for starting?

    Reply
  7. Hannah on

    We need more pages like this ! Thank you for sharing I made a mistake and now I know what I did wrong

    Reply
  8. Cheryl on

    My Dahlia seeds are only halfway up. Do I remove them from the heat mat or do I wait for the rest of them to germinate up?

    Reply
    • BriAnn, Team Floret on

      Yes, you can remove them from the heat mat as long as the room they’re in stays above 55 degrees.

  9. Cheryl on

    My diocese are only halfway up. Do I remove them from the heat mat or do I wait for the rest of them to germinate up?

    Reply
  10. Rose on

    Should the area of the light fixture(s) be larger than the area of the seed tray so there’s overlap around the edges?

    Reply
  11. Carrie King on

    I planted some Blue Scarlet flowers that came up super quick but the other flowers I planted (in the same tray – didn’t realize that was going to be a problem until I read your blog) are not yet up. I will wrap one end of the tray with plastic wrap like you suggested. My question is, some of the Blue Scarlet seedlings are between 2-3 inches tall. Should I thin out the tallest ones so I can keep the light low on the shorter ones so they grow a strong stem?

    Reply
  12. Maegan Yeary on

    I’m worried I overwatered! How should I fix this without having to transplant my little seedlings that just germinated?

    Reply
    • BriAnn, Team Floret on

      Remove any water in the bottom tray and let the soil dry out a bit before watering them again. Hope this helps!

  13. Sara on

    So I definitely made most of these mistakes. The biggest one I’m worried about is mixing trays. So my cucumbers have sprouted but my carrots have not. I even mixed carrots and zinnias together, ha.

    Not sure how to deal with the humidity dome on the ones that have sprouted versus the ones that haven’t.

    Should I try moving them into a new tray?

    Reply
    • BriAnn, Team Floret on

      Cut some siran wrap and put it over the ones that haven’t sprouted yet. You could move the cucumbers when they’ve developed a couple sets of leaves on them so they handle the transplant better.

  14. Nancy on

    Help! I have a nice set of yarrow that sprouted and has been under the grow light for weeks but they are not growing past their first set of true leaves. I thinned them to two per cell but they really aren’t growing. Still green, but still tiny. Any advice?

    Reply
  15. PopPop on

    Wow what a difference this made. I always lost about half my flower seedlings 🌱 before they made it out side then I lost half again when I transplanted in the garden. For my Zinnias I start 110 seeds to get 25 plants in the garden and they are always too tall.

    Thanks to you I lowered my lights witch gave me strong compact growth like the stores sell. It is close to time to transplant my Zinnias and I am not sure were to put them all. I have 101 Zinnias ready to go outside 109 popped up and I only lost 8. Changed how often I feed and water from the bottom up what a difference it made.

    Reply
  16. Stephen Romano on

    I used a seed tray for the first time this year and ran into an issue where none of the middle cells germinated for the first 3-4 weeks. I *think* I figured out why – the middle of the bottom tray (which holds the water) isn’t perfectly flat and so when I started watering from the bottom, the middle cells didn’t get any water. I filled the bottom tray a bit more than usual this past week and now the middle cells are finally showing growth… but the perimeter cells are drenched!

    Any advice on how to best flatten the bottom tray so the cells are all watered evenly?

    Reply
    • BriAnn, Team Floret on

      I’d suggest letting the soil wick up the water for 20-30 minutes and then dumping out the extra water.

  17. Craig on

    I just planted a variety of vegetables in the trays located in liners and acclimated in my basement. I am utilizing heat pads underneath my tomatoes and peppers. I also put domes on and just finished setting up a 4-ft light with chains so I can adjust it. My question is having just planted the seeds today when do I begin to add light? When the seeds sprout or do I add it today while they are still under the soil? And does the dome play a role in any of that? I realize the dome has to come off once the majority of the plants sprout but I read somewhere that someone said you should never do lights and a dome at the same time. Thank you in advance for your response

    Reply
    • BriAnn, Team Floret on

      Once the seeds sprout then you can place the lights above them and remove the dome lid. However, some seeds require to light to germinate so having a ceiling light turned on during the day for light germinators would work fine.

  18. Amanda on

    I had beautiful little seedlings pop up of your Sangria Pincushions until I forgot I needed to take off the dome (half off them died quickly). It looks like the other half are going to make it. It sounds like I still need to adjust lighting but it’s a bit difficult to figure out since I’m doing this on a shelf in my laundry room ;-) I’m just super happy to have something green popping up to get me through this dreadful Minnesota winter.

    Reply
  19. Evelyn Eveleth on

    I think I’ve made a rookie mistake. My seedlings are growing happily under my light set up about 1-2 inches. However, I have kept my lights on 24/7 oops! Sounds like lights should be on only 16 hours per day? What is the best way go about decreasing the light . Can I start turning lights off at night or will that be too drastic?

    Reply
    • BriAnn, Team Floret on

      Turning them off at night works great and replicates our day and night patterns.

  20. Rebecca on

    I wish I found this 4 days ago! I think I’ll be okay on some seeds I started, but concerned on others. I’m glad I found it when I did, I would have made a lot more mistakes haha. Thank you!

    Reply
  21. Amy A on

    I’m noticing A LOT of water on the dome, about 2-3 tablespoons a day and there is a fuzzy white mold growing on the surface of the soil. I haven’t had to water because the soil seems wet enough. Is this all to be expected or is there possibly a lack of air flow that is adding to that much water on the dome. The vents are wide open on the dome and I have the cell tray on a heat mat. I need a “What to Expect When You’re Expecting” for seed starting. :) Thanks for any advice or words of consolation. –Amy

    Reply
    • BriAnn, Team Floret on

      The soil might be too saturated causing mold to grow. Be sure to use clean trays, new soil, and fresh water to help reduce the risk of mold.

  22. Rob on

    Some of the seedlings have started to germinate. Some haven’t. There is some green (moss of similar) on the soil surface too. So I’ve propped open the lid. Is this correct. Generally do you remove the lid as soon as one or two germinate or until all have done so?

    Reply
    • BriAnn, Team Floret on

      The soil may be too wet so draining out excess water after watering can help. The dome lid can be removed after 50-75% of the seeds have germinated. Happy planting!

  23. Jamee on

    I didn’t pre-moisten the soil so the soil was not absorbing the water (also top-watering) and the egg cartons got too moist so they grew mold. All the seeds went bye-bye and I started over, direct sowing, with much better luck! This year I’ve got proper tools & more knowledge, so I’m ready to head into spring!

    Reply
  24. Sarah on

    How long do you leave water in the bottom of the tray for? I’ve heard you should only have water in there for half an hour and just enough time for the water to be absorbed.

    Reply
    • BriAnn Boots on

      Once the soil absorbs enough water, any extra water in the tray you can dump out. Usually after an hour or so.

  25. Peggy Snanigan on

    I have been held up on the couch with covid and couldn’t find anything good to watch on TV and then I saw Growing Floret!!! Binge watched all the episodes and really enjoyed learning about and from you. Watching everything grow from Spring to Summer is always such a joy, I have had good and bad luck with all my herbs, perennials and annuals. It’s such a learning process finding out what does well and where. I have never tried growing Daliahs, but after watching your show, they are on my list to buy. I started feeling a bit better and went out to my potting shed (after dodging the Robin who laid her eggs in my wreath on the door) and pulled out my seed starting kit.
    LOL, I thought that this was my time and my seed starting was gonna work! I will blame my ignorance on too much medication. Putti
    ng all the same germination time seeds into the flat only makes sense when you think about it, but I have about 6 different type seeds in mine. Better luck next time!

    I LOVE all the mini course info you have made available.

    Reply
  26. Debb on

    This is my first year doing this & it is going extremely well. I DID plant several varieties under one dome & this is how I solved the problem of the peppers germinating much slower than the tomatoes: once the tomatoes germinated, I removed the plastic cover, but added a bit of plastic wrap to the top of the containers with peppers & kept the heat mat on. It worked! They just germinated over the last couple of days & look healthy.

    Reply
  27. Katie on

    From what I have read in other places – if you started different seeds in the same tray, you can wait to see what germinated first and starts to touch the dome. You are basically caught between waiting for seeds to germinate and not letting plants that germinated quickly start to die. (I started arugula, spinach, Marigolds, cucumber, and two types of beans – my arugula took off but my spinach did nothing. In order to save my arugula- I took the dome off.) I’m hoping the sun can still help the seeds that didn’t germinate as quickly as arugula, such as my spinach. It’s a learning lesson for sure!

    Reply
  28. Joe on

    upon reading this , i realized I planted different plants in my tray and some just germinated and some not yet..ughh, what to do? I know , hope for the best !

    Reply
  29. Tiina Fridley on

    This spring I have encountered a problem I have never had before. The seeds begin to germinate, I can see them beginning to push up through the soil, and then they stall. Like my early tomato plants, I see the loop of the stem pushing up with the cotyledons still partially in the soil, and they stayed that way for over a week instead of straightening out. Have you ever seen that happen?
    My planting mix is peat moss mixed with some perlite. I bought a large bail of each and mixed it myself. I keep the mix in a large covered barrel and it usually lasts me two years. I have been starting seeds for 20 years and have never run into this problem before.

    Reply
  30. Amanda on

    Great question, I’m wondering the same. Do we keep the dome on until all seeds have sprouted?

    Reply
  31. Marianne on

    Thank you for all this good information. I have a qu’about heating mats. If your seeds germinate at an uneven rate, at what point do you remove them from the heating mat? Only about half my seeds sprouted at this point. Thanks!

    Reply
  32. Joseph Michael Martinez on

    Thank your Joanne. This is valuable information. I’ve definitely made some mistakes trying to germinate and just got my first heating mat to help.

    Reply
  33. Emma Murray on

    I didn’t realize about tamping the cell soil down, and have planted two trays already. I have super limited space so I did plant more than one type of plant per tray. I planted them based on their germination rates (8-10 weeks, 6-8 weeks, and so on). I hope this is okay… ugh! Please let me know! Did I ruin them…

    Reply
  34. Joanne on

    1st time starting my own seeds. Should have found this site 4 hours ago.

    Once seeds are planted and the dome is on do you put them under grow lights or wait till they germinate?

    Reply
  35. Tracy on

    Is there a seed starting set and heating mat that you recommend?

    Reply
  36. Christina St. Pierre on

    What do I do when about 10-20% of my sweet pea seeds have germinated and are already outgrowing the humidity dome but the rest haven’t come up yet? Last year my germination rate was abysmal as well, but this year I used heating mats and 4″ deep pots as you recommend on your sweet pea section, with the same potting medium and vermiculite, watering from the bottom. What am I missing? Why are they so uneven?

    Reply
  37. Diane on

    K, I have no idea which seeds would take as long as 6 weeks to germinate, but yes, if you want faster and more reliable germination, you can put seeds in their little containers on a heat mat, just until they pop their wee heads out. humidity dome left on too. But you’ll want to take off the humidity dome and remove the heat mat after they germinate, or they could drown or fry, or get some nasty disease. You don’t have to use a heat mat at all, but I’ve had great success with them. Petunias that can take up to 28 days to germinate, and I’ve had them pop up within 5 days using heat mats. If you do use a heat mat, a thermostat is highly recommended so you can keep an eye on the temperature, and not toast your plants instead of growing them . Good luck!

    Reply
  38. Heather Locklin on

    Gerry…yes I usually cut my trays like that up into more manageable pieces…usually into 6 packs

    Reply
  39. Gerry Lloyd on

    I really appreciate your mini course in seed starting! I learned about using vermiculite even for light-requiring seeds! One mystery still there…how do I get seedlings out of a solid 72 cell flat without destroying the remaining 71? Help! (I ordered online 6 trays thinking they would be a set of 12 6-packs each. ) Should I cut them apart?

    Reply
  40. K on

    If a seed takes up to 6 weeks to germinate, does it have to be on a heat mat that entire time? And with the humidity dome on the entire time? I just want to double-check this, because that can add up to one expensive flat of seeds if you have a lot to germinate!

    Reply
  41. Anne Riordan on

    I am 1st time seed starter too. Do you need grow lights in a green house? And when they germinate, do they no longer need the heat pad?

    Reply
  42. Lisa on

    I just started Sunday and I’m glad I stumbled upon this! It’s definitely helpful. I still have a few seeds to plant and one more tray to do. I have some growing now and some not yet. So I wish I would’ve Read this first. So next time I’ll follow all of the suggestions here.

    Reply
  43. Camphomestead on

    I’m literally dealing with this same scenario. Painful lesson learned . I had to emergency transplant my cucumbers, and green beans into 4 oz pots bc I decided to be “cost effective” and purchase a 72 cell seed starting tray , plus it fits on my 10x 20 mat perfectly BUT in about 3 days the roots where go thru the tray and I hope and pray that I didn’t disturb and or damage the roots to much. Smaller cell trays = less transplanting = less disturbance to the new root system.

    Reply
  44. Andrea Wells on

    Oops. First time seedling grower. I guess I should have googled this first. My cucumbers are taking off like rockets and my tomatoes are a no show so far. Thank you for the helpful info. I’m glad I bought an extra tray so I can do it right!

    Reply
  45. Ryan on

    Same question about different plants sprouting at different times. Commenting so I can follow the conversation.

    Reply
  46. Jessica on

    Hello floret team!
    I hope everyone is doing good and healthy in this different time were all facing. Luckily I do have all my gardening stuff and I’m waiting to plant. But when I ordered my flowers, cell trays and domes I didn’t know about starting like flowers in the same trays so I ordered 50 cell trays. Well I have like 7 different types of flowers under one 50 cell dome. What do I do when one type of flower has sprouted and other havnt.?. Any advise?

    Reply
  47. Brandon on

    I have the same issue where I have 3 tomato seedlings that popped up fairly quickly and the other 15 or so in the tray/dome hasn’t sprouted yet. I’m not sure if I should remove the germination dome or not for these 3 seedlings or keep the dome on, but maybe cracked a little to let in air.

    Reply
  48. Susan Wallace on

    Thanks for the post. Great tips! My question is that all of my seedlings (same plant) don’t Germinate are the same time. Do I keep the moisture dome on until all come up? Are the ones that come up ok to stay under dome? Seems some a bit slower to come up.

    Reply
  49. vivian gerard on

    yes i planted sweetpeas outside and then they froze

    Reply
  50. Liz on

    Thank you for this post! I am seed starting for the first time this year, and I am modifying my plan based on your suggestions. I would have gotten one big seed starter dome, but instead I’m going to get a pack of small seed starters so I can take off the covers at different times. You have saved me a lot of stress!

    Reply
  51. Rin on

    hi, i started my seedlings about 2 or 3 weeks ago. i was soaking them far too much with water to the point where they seem saturated and leaving them in a mini storage bin greenhouse i made- exposing them to such high heats.. there is a possibility they were killed or that they are molding.. im really hoping that if i give them more air and only put the top of the storage bin on at night & if i let them dry a bit so that they have a good level of moisture they will make a come back… ugh. Any advice at this point is much appreciated~
    kindest,
    R

    Reply
  52. Jessica on

    I was doing so good with my seedlings until yesterday. There wasn’t any sun and I left the dome on. My seedlings basically drowned :/

    Reply
  53. Allaiyah Weyn on

    I hope this helps with my Ground Cherry growing. I lost every single sapling I had last year.

    Reply
  54. Olivia on

    Hi Erin! I did some Cosmos last year and something really odd happened. I started them off in a very light potting shed and, though I was a bit unfocussed with my watering, they still grew and were looking fairly healthy. By the time summer came I figured it was time to plant them out as they were looking a bit stretched! So I planted them and here’s what happened: they put out the most beuatifully lush leaves. I almost had a forest! But no flowers. So I waited and waited….. Then boom! October came and everything else was starting to wane and thats when my Cosmos, literally, burst into flower! Never seen anything like it. I had so many flowers, it was amazing. Like an autumn firework. Has this ever happened to you?

    Olivia

    Reply
  55. Ilan on

    Thanks for the great article. I recently bought a humidity dome and a 4 bulb T5 installation. I planted lettuce, basil and sweet pea seeds in rockwool, ph adjusted the water and placed under a 7 inches high dome. When the seedlings sprouted I removed the dome (as per your instructions) and also moved the lights close to the seedlings (also as you suggested). However, I found that the lights were drying out the rockwool and my seedlings were getting parched and burned. I’m not sure why this is happening because everyone says that you need to move the lights very close to the seedlings to avoid legginess. I was wondering if the problem is that I took the dome off too soon and the humidity was low so the plants got parched. Any advice would be appreciated.

    Reply
  56. Amanda on

    Is there any way to help the plants if you didn’t harden them enough before transplanting? Cover them? We seem to have made a very big rookie mistake

    Reply
    • Team Floret on

      Hi Amanda,
      Mistakes happen to all of us. You could try putting a row cover over them for a few days. Hopefully this will help them adjust. Good luck!

  57. Kassi on

    Helpful info, thank you Erin! Do you have a list of seeds that need darkness to germinate? I have most of what I’ve started so far under lights as soon as I planted the seeds and now I’m wondering if that was a mistake. Only about 10 of my Chocolate Lace Flower seeds germinated. Same with a few others. Should I remove the humidity dome as soon as I see even just a few sprouts, or keep it on until I see more? Thank you!

    Reply
  58. Lisa on

    Lots of great tips! Tamping the soil and then again, from the get go, to get a better removal of roots… DUH! I always forget to do this and my removal for transplant is a mess! That simple explanation is like gold to me! Thank you

    Reply
    • Team Floret on

      So glad it was helpful, Lisa! Happy gardening!

  59. Tessa on

    Great tips! When I started snapdragon seeds on a heat mat, they sprouted in 2-3 days, but the stems were very thin. When I removed the dome and used the heat lamp at a 4″ height, half were fried! I have saved the rest by raising the lamp to about 12″ but I’m afraid they will still be spindly. Any ideas?

    Reply
  60. Kim Gourley on

    Hi — you have mentioned on the site about using potting soil, seed starting mix and vermiculite. I’m a little confused as to whether these are all to be mixed together to sow the initial seeds (and if yes, what portions of each) or if I should be using potting soil and dusting them with the other products? Could you offer some guidance on how to use these three types of products for sowing seeds indoors?

    Many Thanks.

    Reply
  61. Amanda on

    Great post! Very informative!

    Reply
  62. Elizabeth on

    I made ALL of these mistakes last year. Moving to Vermont from San Diego and reducing the growing season by 2/3 had me really wanting to push the envelope. Not worth it, I learned. To the list I would also add “don’t travel while you’re starting seeds, unless you have a knowledgeable helper” :). My husband killed off all my Floret anemone and ranunculus babies last year with excess love/water.

    Reply
  63. Sarah on

    Hi there! In one of your blog posts – you listed some of the places you have purchased seeds and dalia tubers from, but I can’t seem to find the post! Would you mind pointing me to that post or your rec’s? Thanks!

    Reply
  64. Tobey on

    My latest oops is having mixed my plants in the tray. You’re right – the sweet peas want the lid off and the larkspur hasn’t germinated yet. What do you think of laying plastic wrap over the yet-to-germinate cells, if I check every day? And promise to not make that mistake again!!

    Reply
  65. Anna PRICE on

    Same exact problem here! I’ve just about given up on them. I keep hearing they’re easy, but they sure aren’t for me! Any tips would be appreciated.

    Reply
  66. Amy on

    Hi Erin and Team Floret!

    Thank you for preparing so much helpful information! I can’t imagine how time consuming and complex it was to literally write the book on flower growing, and then to condense so much of that information into bite-sized, informative blog posts. It is such a huge gift to growers and aspiring growers (and people who never thought is was in the cards for them to grow anything, but now find themselves inspired and empowered) around the world.

    Quick question… do different flowers have estimated timeframes to germination, the way they have estimated timeframes to maturity? I ask because I can really only afford maybe three heat mats, and I want to set up a schedule for what order I should start my seeds, considering I will only be able to warm three trays at a time.

    Thanks!

    Reply
  67. Angie Croshaw on

    I have the exact same problem. Would love some tips! :)

    Reply
  68. Mariam on

    Can you help with tips specific to poppies? I have tried so many methods (heat mat, no heat mat, waiting to water, lots of water) and nothing is working. They germ then die off. The ones that did survive, haven’t really grown. I have had success with every other seed/corm/bulb I purchased from you. Please advise. TIA

    Reply
  69. Bridget on

    Great tips!! I lost a bunch of plants last year because I didn’t harden them off. Ugh. Not this year! This series has been so helpful!

    Reply
    • Team Floret on

      Great! So happy to hear it is helpful, Bridget!

  70. Tracy on

    Hi Susan,
    Thank you for your time, energy and support from all of us. I just purchased a greenhouse at the Seattle Flower and Garden Show and I am going to follow your blog, book and website. Looking forward to gardening another year armed with your insight, experience and inspiration!
    Thanks!

    Reply
  71. Kim on

    Hi. I greatly appreciate all of the details and guidance you are providing. I’m a newbie at all of this and your blog has inspired me to give this a try. You mention above using “grow lights.” For a home gardener, do you have a recommendation? Not sure what I should be looking for? I found a local store that looks like specializes in grow lights and hydroponics, but admit to being overwhelmed at all of the options? Appreciate any recommendations!

    Reply
    • Susan King on

      Hi Kim, you can actually use regular ‘ole fluorescent shop lights! –Team Floret

  72. Killoran Moore on

    Bottom heat. That’s the big one. I just don’t have access to/funds for it this year. Not on the scale I need. The difference in germ is staggering. Like, 40% loss, instead of maybe 5%. Ugh.

    Reply
  73. Emma on

    Oh my this hits home – I have over watered, left dome lids on, not heated, planted too early, which has left me empty, sad and awfully guilty of not getting my seeds to their full potential, however when I do get it right it’s amazing!

    Reply
  74. Kelsey on

    Thanks for all of this info, it’s gold!
    One question I have- I’ve noticed you have shorter, maybe 2″ domes and larger, maybe 4″ domes. Why would you need different heights if you take them off immediately after the seeds sprout?

    Reply
    • Susan King on

      Good question, Kelsey. The height really doesn’t matter much. The tall domes serve double duty because we also use them on trays of new mum and dahlia cuttings.

  75. Katharine on

    I’d love info on succession planting of flowers. I never know when to start the next batch. I’ve found lots of information for veggies, but not for flowers. I’m in zone 4b – cold winters and hot summers.

    Reply
  76. Laura Thorne on

    Maybe I missed it, but do you use a top layer of vermiculite (or I’ve heard chicken grit) over the top of the soil to prevent dampening off?
    Also, thanks for the tip about not sowing more than one type of seed in a tray due to different sprouting times and plant height – I was wondering about that! As a home grower, I don’t need 50 of each type of flower and hope I can find some smaller trays…

    Reply
  77. Fiona Kennedy on

    Hi Erin as a beginner flower farmer in the west of Ireland I find your blog and website an invaluable source of advice and inspiration. Thank you for taking the time and effort in sharing all your experiences which helps demystify flower growing and I know will help me avoid so many rooky mistakes (so often you describe how NOT to do something… which is what usually what I was about to do!) so thanks for virtually hand-holding me all the way across the Atlantic. I can’t wait to get my eager mitts on your new book!

    Reply
  78. Placidus Lee on

    I’ve already started my first plants, Digitalis “Camelot”, and will start more in a week or so. I’m trying out many surface-sow or barely cover plants this year, which is quite counter intuitive. It’s a little nerve racking, especially since some taking 14-21 days to germinate, but I do have several little seedlings popping up already!

    Reply
  79. Rhonda on

    Hello! Thanks for such great information. I noticed yesterday that I have some super cute baby plants poking their heads up!! So exciting but nerve wracking!! I hope that I can keep them alive. I am starting my little flower farm this spring and I have high hopes for these babies!

    Reply
  80. Samantha on

    Erin,
    Do you use a dome for starting Snapdragons indoors? Or do they prefer the cold?
    Thanks!

    Reply
    • Susan King on

      Great question, Samantha. Domes are great for starting most seeds. Yes,snapdragons do like cooler weather, but that reference is to once they are transplanted outside (snaps can be transplanted outside before your last frosts unlike tender/frost-intolerant annuals). While the baby snapdragons are still in their seed trays under lights or in greenhouse you can treat them like the other flowers. Make sense? Happy seed starting! –Team Floret

  81. Viv on

    My problem is my cat critters, wanting to snoop/poop in my flats of seeds or baby plants. I can only keep an eye on things for so long, and just when I think they’ve forgotten– they are in one or more of them. Either in my sunroom–or my old glasshouse, they are loved and spoiled, but , —- I’m going to invest in more humidity domes, and put big holes in them. Also , when I set them outside to acclimate, I’ve found squirrels digging in the flats. Seems like I’m always on critter patrol!!!!

    Reply
  82. Sierra Birch on

    Erin,
    I have sweet peas going right now, but out of 21 only 4 have sprouted so far. I still remove the dome now, right?

    Reply
  83. Lynn on

    As usual, such good information you’ve shared – thank you!! Do you tamp the soil down as you fill the cells or after you’ve put in the seeds – this is the first time I’ve started seeds inside, and I really would like them to survive :) Outside – no problem, but inside’s another story.

    Reply
    • Susan King on

      So glad you find the information useful! Yes, tamp the soil down as you fill the cells and before you put the seeds in. Good luck with your seed starting! –Team Floret

Leave a Comment

Floret Farm's Small Plot: Big Impact

Small Plot: Big Impact

Inspiring stories, profiles & advice from 45 flower growers from around the world

Stay in the loop with our updates

Close

Join Us

Join the Floret newsletter and stay in the loop on all the exciting happenings here on the farm

Close