Meet the Floret Ducks
Learn how to start your seeds
Home Blog Season Extension
February 24th 2016

Season Extension

Written by
Floret

Floret_Season Extension-7
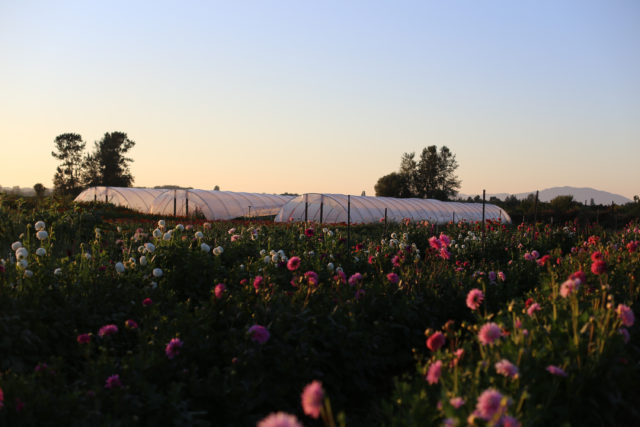
Our little farm is situated in damp, foggy and ultra rainy western Washington, about an hour north of Seattle. Some years, if we’re really on a bad weather kick, the sun won’t make an appearance for months, literally! Springs are cool and long, and unless you have a ton of bulbs or greenhouses, cash flow doesn’t really start to kick in until the field flowers wake up in June.

But by March my inbox is already full of notes from excited customers, ready to begin another flower season with us. They are hungry for color and life after so many months of grey. In the beginning, we slowly stretched our season out by stocking the field with fragrant narcissus, tulips and biennials, but these measures didn’t go very far when everyone was clamoring to get a piece of the action. When demand was at its peak, we never had enough flowers to go around.

Floret_Season Extension-3In an effort to capitalize on the ever-increasing spring demand we started adding covered structures into the mix. While hoop houses and low tunnels are a big financial investment, we’ve found that we are able to recoup the cost in just one growing season because the covered space is so dang productive.

Floret_Season Extension-12
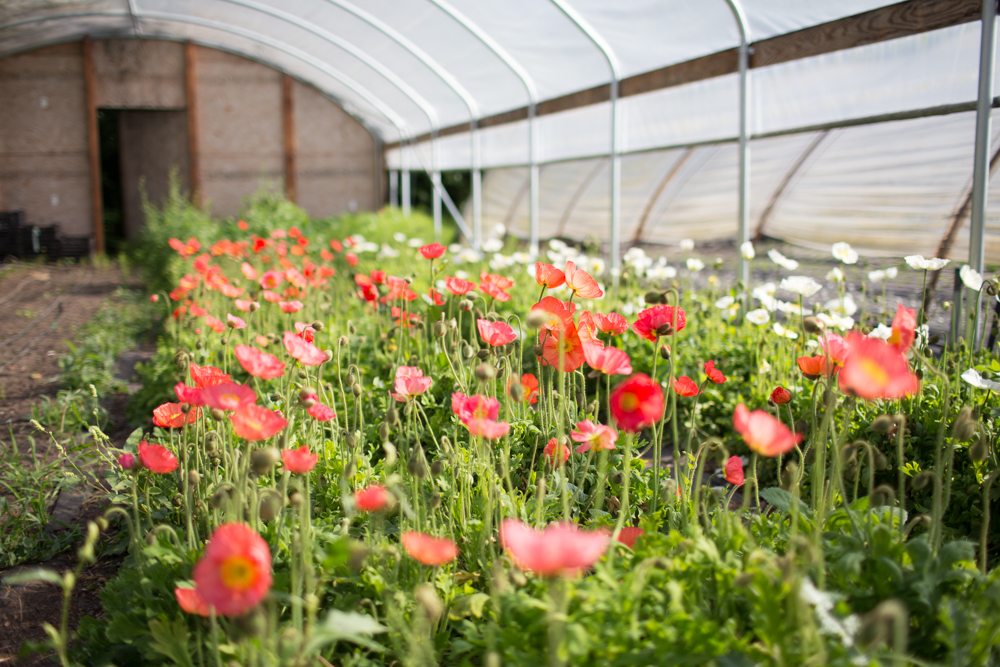
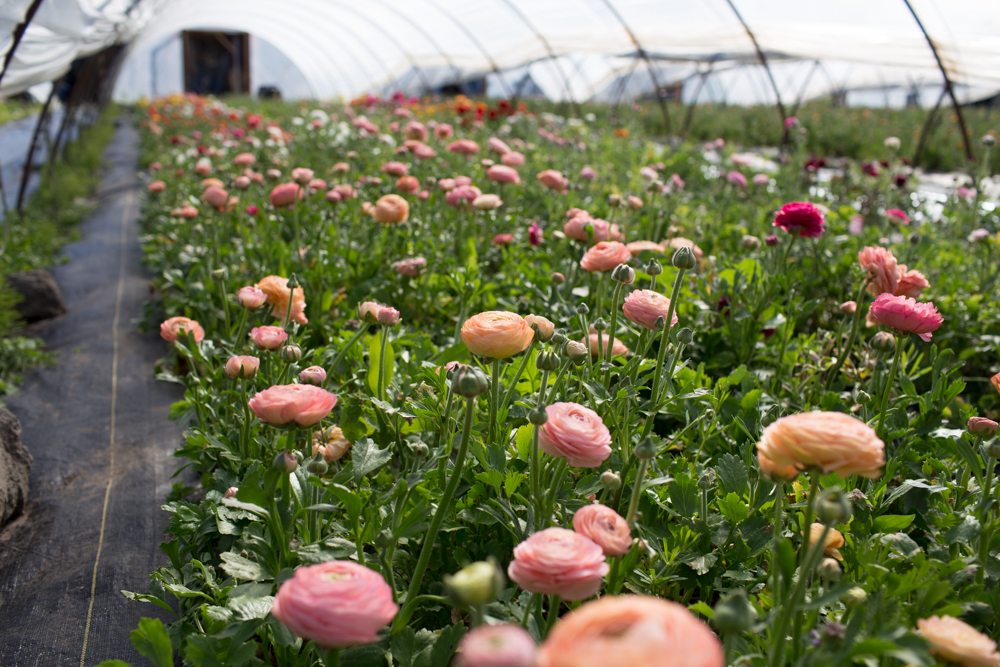
Hoop house crops flower up to six weeks earlier than the same varieties planted outside which allows us to get two full crops out of each growing bed in a season. For example, a bed of Ranunculus generally finishes flowering in mid May, then it’s pulled out and replanted with Lisianthus that will flower from early July through September, and when that’s done, it gets pulled out and replanted with anemone corms that will flower the following spring.

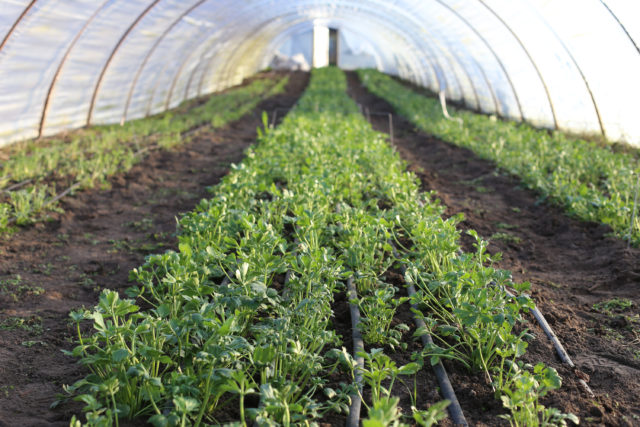
Hoop houses and low tunnels have many benefits in addition to extending the season. Flower quality is greatly improved because there is no damage from the wind, rain or hail, and disease pressure is usually much less than out in the field. Stems are consistently much longer and the near perfect blooms always bring top price!

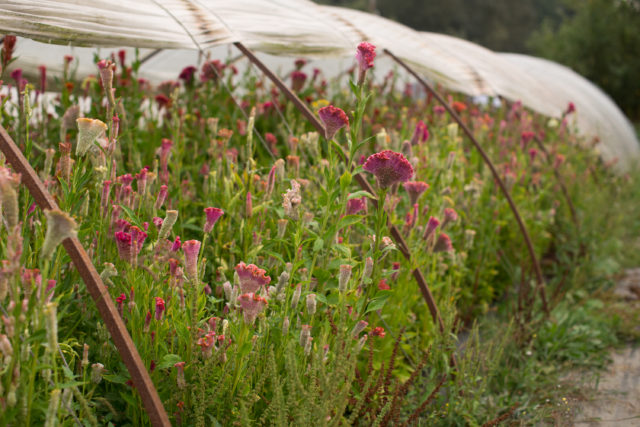
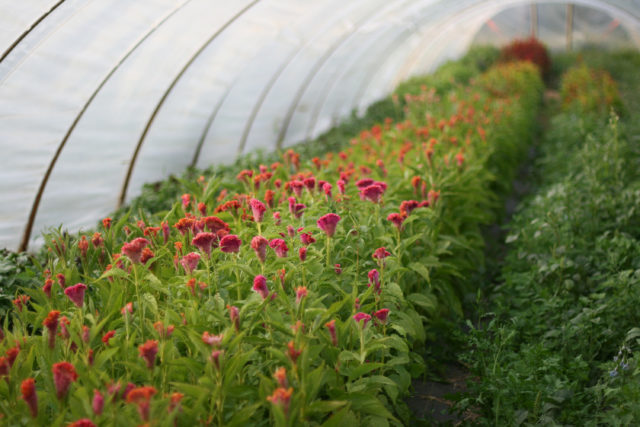
In our climate, warm season crops consistently struggle to thrive. Basil, Lisianthus, Scented Geraniums, Globe Amaranth and Cockscomb rarely get very tall in the field and always melt into a moldy mess shortly after the rains return in September. Having a warm, dry space for them to grow is fantastic.

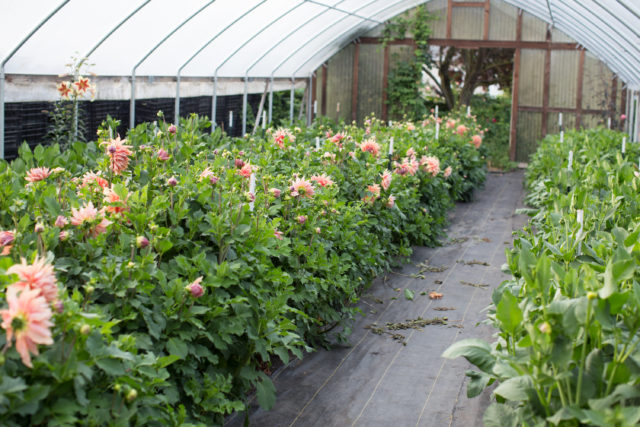
Dinner plate dahlias also prefer being tucked inside. We’re able to have flowers by July most years, when the field grown plants don’t start producing until late August-early September. But having covered space to work in when the weather is bad is probably the best part of all!

Getting an earlier start in the spring, protecting crops from the elements, expanding what we can grow in our cool climate and keeping flowers and foliage going long after frost has made life as a flower farmer much easier.

While most of the experience with hoop growing has been positive, there are a few problems we’ve run into. First off, because crops get bigger in the hoop, sometimes spacing can become an issue.

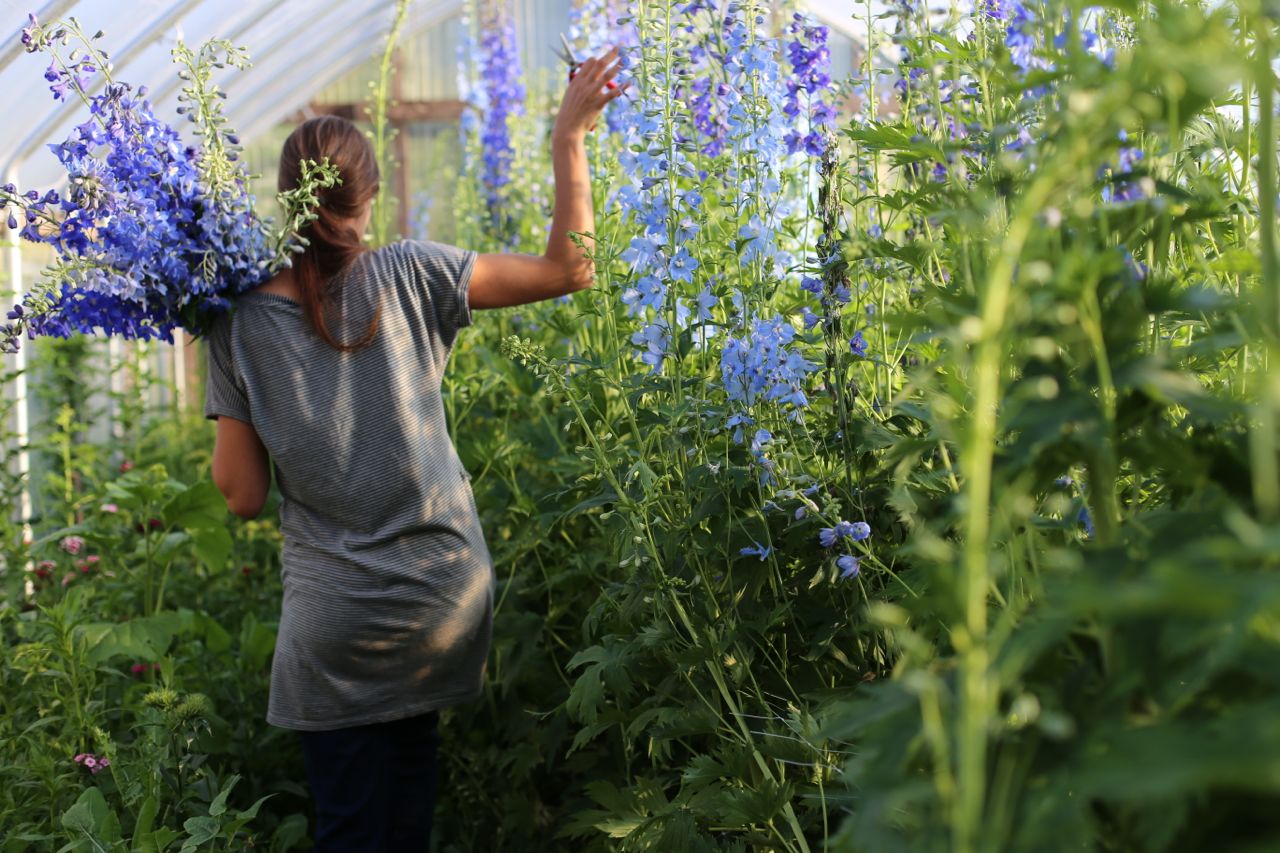
In the field our larkspur and delphinium generally get about 4-5 feet tall. In the hoop they reach 7-9 feet tall! Honeywort generally gets about 30″ tall in the field, but undercover it grows to 4 feet and if planted in a side bed it’ll crush itself on the curved sidewalls leaving only half the crop harvestable.

Another issue is plant spacing. In the field, plants are crammed really close together. Most crops are grown in 9 x 9” spacing with five rows to a bed. Paths are often only 12-18” wide and harvesting in these tight conditions can be tough but is still doable. In the hoops, depending on the crop, this approach doesn’t always work.

For bulky growers, navigating the jungle of foliage without damaging the plants is almost impossible. It’s important to increase path width to accommodate the lush, unchecked growth.

Staking is another must!

Floret_Season Extension-2
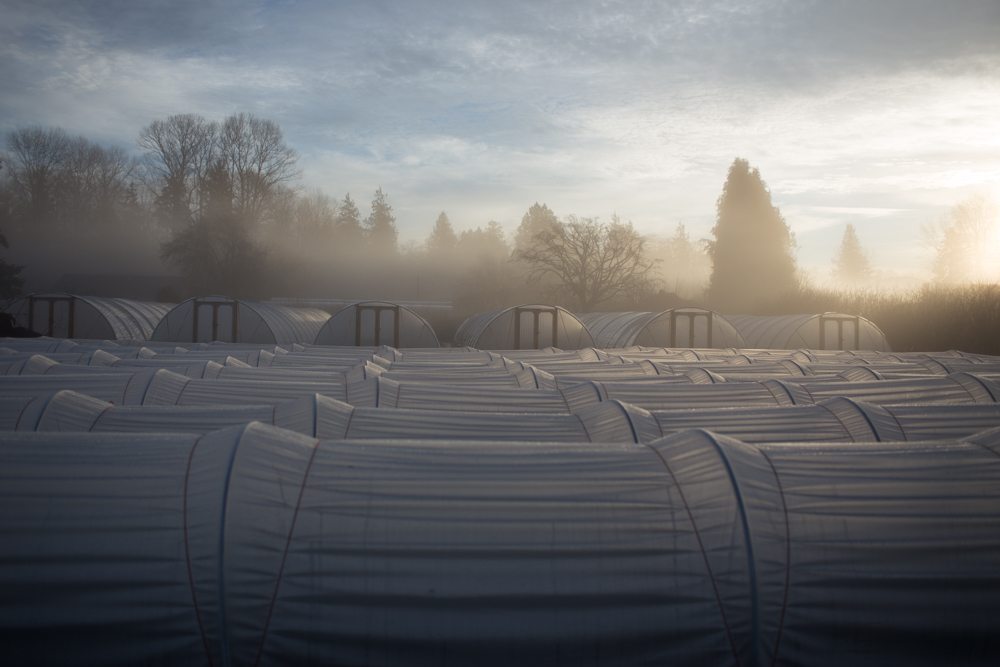
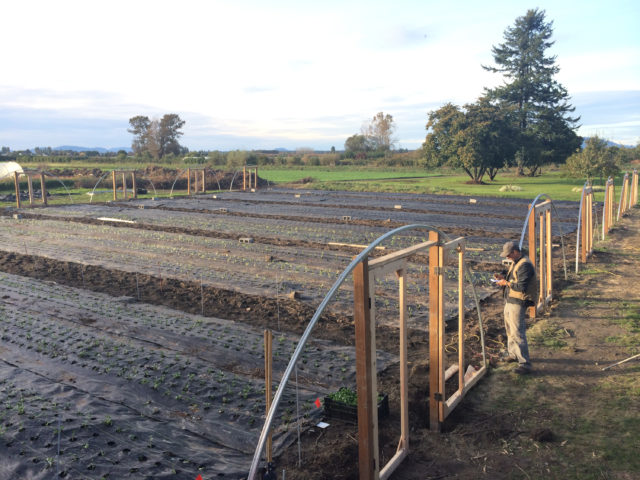
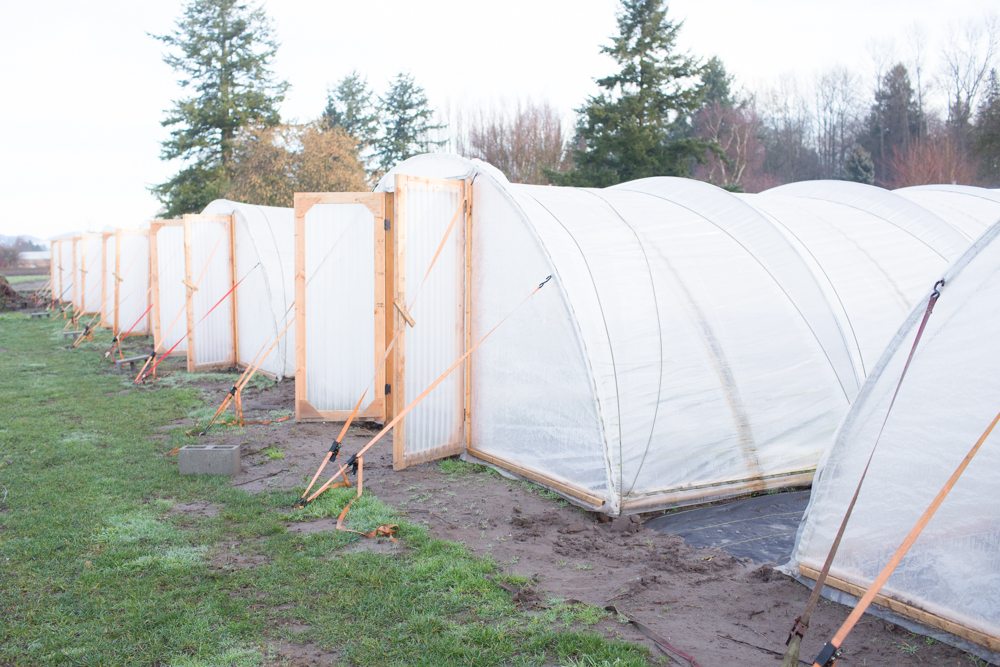
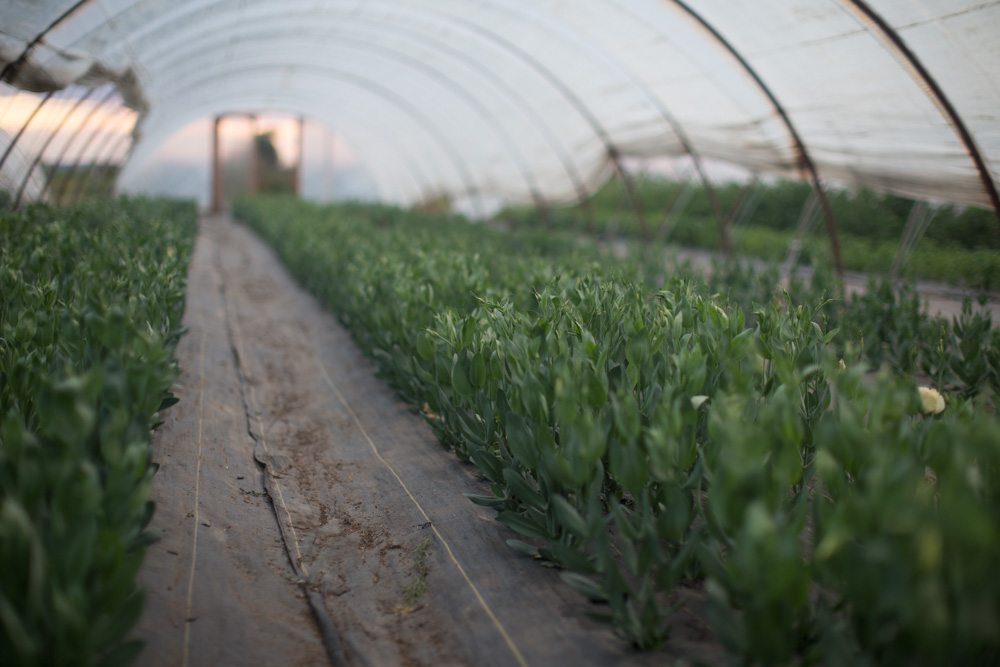
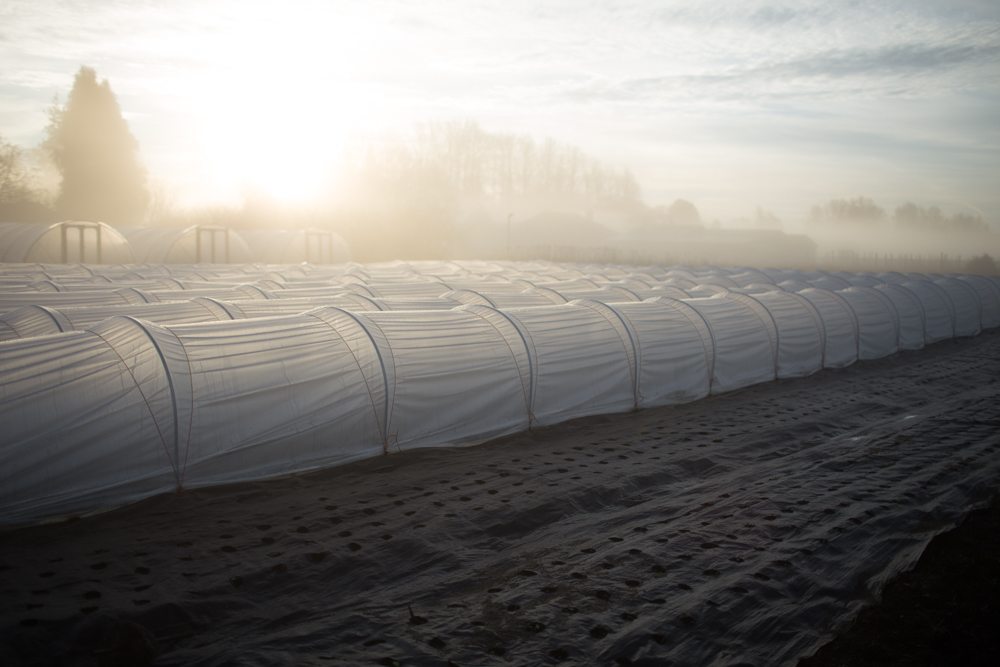
On our farm we have three main tunnel types. The first are professional models that we bought as kits from Oregon Valley Greenhouses and assembled ourselves on site. These heavy-duty tunnels are designed to handle weather extremes and are built to last.

We have four large 20 x 60 foot long high tunnels (pictured above). The reason they are only 60 feet long is because that’s how wide our side yard is. If I had the choice, I would have made them 100 feet. Three are unheated with four-foot tall roll up sidewalls and the other has double inflated walls, heat and electricity which use for starting all of our transplants in the spring.

If you can swing it, investing in one of these large hoops is great! But if you’re just starting out, are on a tight budget or the land you grow on is being leased, here are two more options to consider.

Floret_Season Extension-10
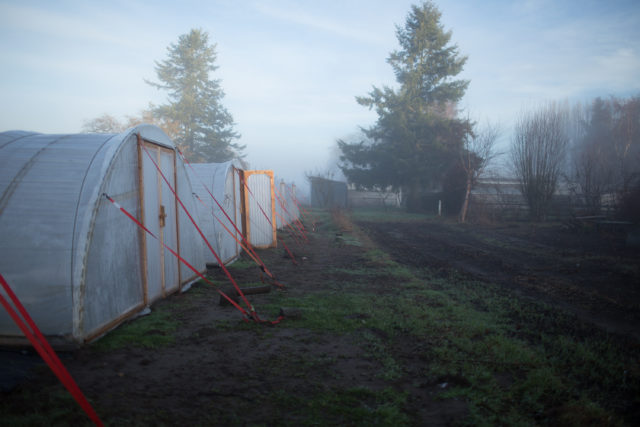
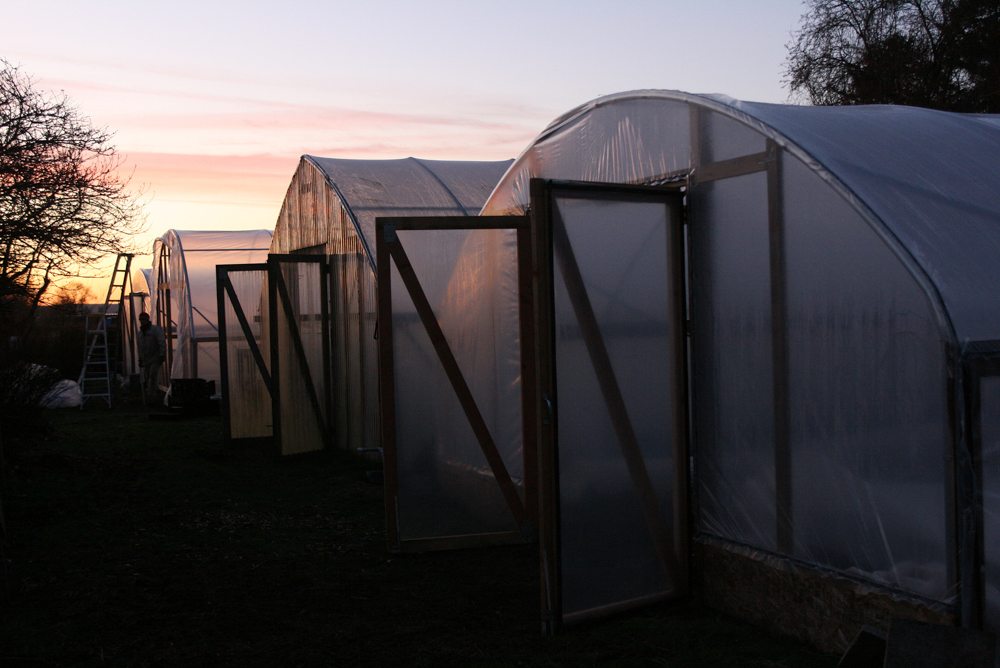
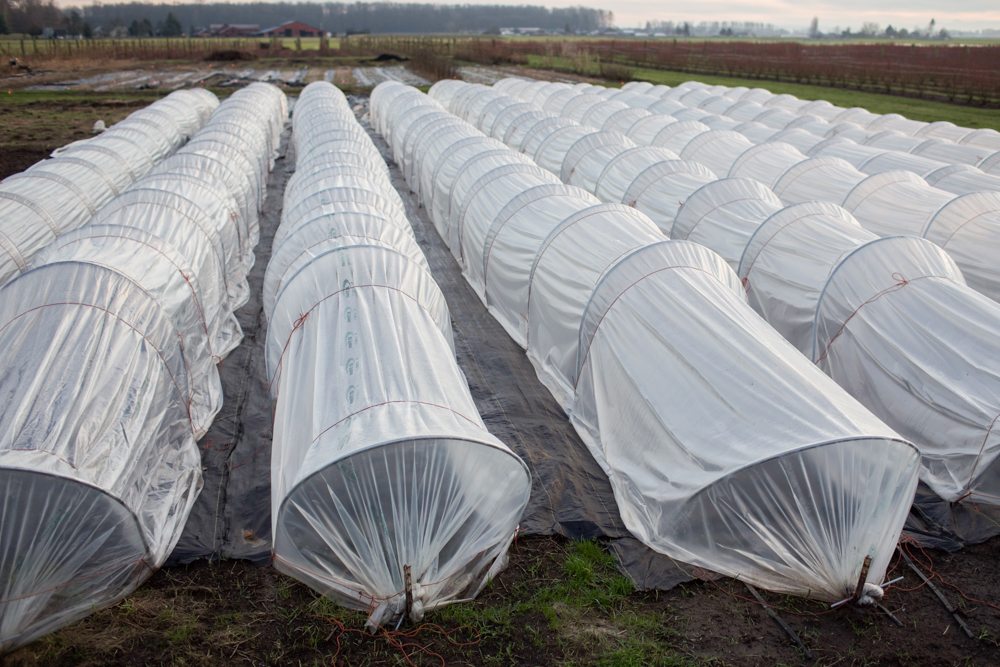
Some years back Tony and Denise Gaetz, owners of Bare Mountain Flowers, graciously welcomed us to their farm and spent an entire day teaching us the ins and outs of homemade greenhouse construction. There we found out about the “hoopty tunnel” (pictured above).

These smaller, extremely easy to build houses are amazing, especially if you’re not super handy or are on a tight budget. One 17 x 100 foot house costs about $1000 and can be put up in a weekend (including pipe bending) for about 1/3 of the cost of a larger professional model.

Floret_Grow_More_Flowers-10The three main drawbacks with the “hooptys” are they can’t take much snow, unless they are anchored down they can only withstand up to 50 mph of wind and they have pretty low ceilings, just 7 feet. But if you’re in a mild climate or just need covered space for three seasons, these houses are certainly worth looking into.

My favorite feature about the “hoopty” is the adjustable sidewalls which allow for air flow throughout the entire house. We modified our six just a bit from the directions. Since our soil is pretty much pure sand, we poured footings for each rebar stake that the hoops sit on, as well as the door frame posts and the large end wall anchor pins. Our area sees quite a bit of wind so the extra effort to securely anchor the houses is necessary.

Complete directions, including a material cost list, pipe bender specs and a very thorough step by step with photos can be found for free on the Kerr Center for Sustainable Ag’s website.

Floret_Season Extension-4 Floret_Season Extension-6
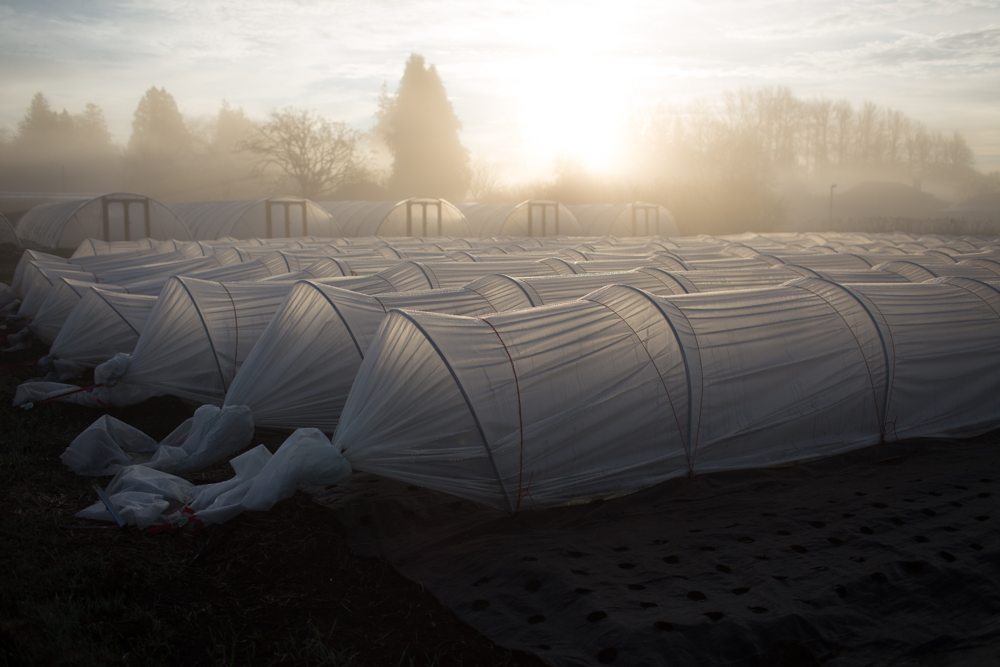
Without any more space to erect larger, more permanent structures we turned to low “caterpillar” tunnels to get a jump on the season out in the field. These mini hoops are great for low growing flower varieties such as Anemones, Ranunculus, Iceland Poppies, Campanula, Basil, Globe Amaranth, Scented Geraniums and Lisianthus. For taller varieties, we just pull the plastic off when the plants near the top and they flower a few weeks earlier than the same ones growing unprotected.

We have a fleet of 20 -100 footers and love the flexibility and affordability they provide. This year we’re going to plant many of our dahlias underneath them to get a jump on the season.

You can find instructions for building them over on Bare Mountain Flowers Blog.

And you can purchase the foot piper bender needed, plus get loads of helpful information on season extension from the Johnny’s Selected Seeds website.

Floret_Season Extension-5While setting aside the time and money to construct any type of covered growing structure requires extra effort, if you can manage it you’ll be generously rewarded.

I’d love to know what type of season extension methods you use, or if you have any helpful resources on this topic that you’d be willing to share.

37 Comments

  1. Jessey on

    Hi! I’m curious if you plant earlier in your tunnels than you would outside, or do they just bloom more quickly. I’m thinking specifically of celosia and dahlias. Thanks!

    Reply
  2. Hannah Harvey on

    Our squirrels tend to enjoy the bulbs planted by our house more than we ever get to—what is the best and fuss-free way(s) to protect bulbs overwinter when they’re planted in a bed by the house and not in a hoop house? I’ve read about laying down “hardware cloth” to protect bulbs, but I’m not sure if that’s safe to also place near herbs which we eat…? Thank you!

    Reply
  3. Macarena Pinto Piessevaux on

    Hellow Erin, I want to know,
    You pinching your Dahlias ands flowers you show on de mini course video, just ones?
    When the seeds of Dahlias are prouted you put them under the lights or yoy put inside the green house?
    You plantas the flower inside the green house for the cold and this way you prevén pollinated to preserve the Dahlias and otber flowers variety?
    I have compost lamb, its very good for vegetales grow and plantas and flowers, last year I put to the soil of Dahlias, thes yeta mi patch will be more big, do you think that compost lamb is a good fertilizer for a soil? For Dahlias?
    Im so appreciate If your help me with this, for a ssuccesfuly. Regreats.

    Reply
  4. Kathy Groff on

    Hi Erin. Loving my new AYear in Flowers. I’m wondering how you deal with marauding deer as they devour everything in sight. I’m sure a hoop house would help, but not everything can be grown in a hoop house.
    I would love to start growing, but this is a huge problem for me. The deer just finished off my fall planted cabbage and broccoli plants; plants they left alone in the spring.

    Reply
  5. Kate and Jon Lockwood on

    Hello Erin and Team Floret,

    We’re looking into making these low tunnel hoops. I’ve noticed yours are a bit different than others I’ve seen. The ones at Johnny’s Seeds are more of a complete semi-circle, making them a little wider and shorter than I want. Yours seem rounded at the top and have straighter, less curved sides, making your hoops taller. Can you explain how you did this? What dimensions of conduit and what sized bender you used?

    Thank you,
    Kate and Jon
    Dancing Beetle Flower Farm

    Reply
  6. Jenny on

    Hi, Erin. I am not a flower farmer– yet but would like to be and want to learn how to grow flowers with low tunnels. I currently live in a neighborhood that has limitations on what you can build in your yard. I was wondering how tall the low tunnels have to be to grow ranunculus? I may be able to make the tunnels as inconspicuous as possible depending on how tall they need to be for flower growth.
    Thanks for you help and hard work putting your website and blog together. It is a work of beautiful art.

    Reply
  7. Tina on

    when planting dahlias in pots before we put them in the ground, should any part of the tubers be above the soil line? one of your instagram photos made me think this. any reply would be so helpful! thank you!

    Reply
  8. Andrea Razul on

    Erin,

    As always thank you for your honest advice which draws endless inspiration. I am an engineer in agriculture with Master in Landscape Ecology Management & Design. We have a small cafe-restaurant in a park in Canterbury where we sometimes sell flowers. I’ve done flowers on few occasions, always letting myself inspire from your blog (words & photos) and my dream is one day to go back to our little holding in Uruguay to become a flower farmer as you are. In the meantime I keep that dream alive with your work which I followed for 3 years or so and celebrate your success! All the best and hope you can continue to give so much even if when achieving recognition from what you do. (Please apologise if my English is imperfect as I am native Spanish speaker!)

    Andrea

    Reply
  9. Kel on

    Thanks for sharing, great timing as I’m currently looking at crop extension methods. Thanks so much!

    Reply
  10. Kendra on

    I happened upon your blog and you’re just about 20 minutes south of me! I recognize the area in your pictures, my husbands family lives in Burlington. What a wonderfully small world :)

    Reply
  11. Katherine Polhemus on

    Hi Erin,

    Thank you for the 101 course on seed starting. I am wondering if start Lisianthus by seed or plug? Everyone says it is a difficult plant to get going.

    It is pretty and very popular but I am wondering how you handle getting it started.
    Thank you

    Reply
    • Floret on

      I recommend buying plugs. Lisianthus can be difficult to germinate and are very slow to grow. Even many of the most experienced growers I know buy in plugs of lisianthus rather than have to heat their greenhouses or fire up their grow lights long before other flowers need to be seeded.

  12. Jackie on

    Heat mats are expensive. I’ve started plenty of seedling using christmas lights and plastic bins. Get some under the bed plastic storage bins. Take a bin and put the christmas lights in the bottom of the bin. Take another bin and place over the lights. This generates gentle bottom heat perfect for starting seedlings. I learned this trick many years ago and it is a nice, inexpensive way to start lots of seedlings. Just wanted to share. Thanks Erin, I just love the February blitz! And your photos are beyond spectacular!

    Reply
    • Dennis on

      Jackie,

      Thanks so much for this idea… we don’t have enough light in our apartment, besides which our window sills are chilly…
      Your work-around is a great idea.

      I just read an article about seed starting using soil blocks over at Bare Mountain . He gives you a “recipe” for a soil mixture

      http://www.baremtnfarm.com/using-soil-blocks-on-the-farm/

      Erin: Is it OK to refer to another site with a link here in the Floret blog?
      Thanks a always
      Dennis

  13. Yeng on

    Thank you so very much for sharing Erin! This is exactly what I was looking for. You’re a lifesaver and inspiration as always!

    Reply
  14. Anne on

    I’ve been enjoying the February blog blizzard. I thought I would also share a plug for the Johnny’s build your own tunnel high tunnel “hoopty” directions which are quite easy to follow. http://www.johnnyseeds.com/assets/information/9018_quickhoops-high-tunnel_bender_instruction-manual.pdf We built a 12′ x50′ a couple of years ago and used longer ground posts so that we have about 8′ clearance in the middle. It has worked well for us… though the 30 x 96 that came later is *really* nice!

    Reply
  15. Sherry on

    Thank you again. You are giving me all the practical information I need to present my husband with the nuts and bolts his logical point of view has to have. My vision of sitting in the shade of an arbor covered in nasturtiums and watching the grand kids run around the beauty and simplicity of a well nurtured garden does not speak to his heart the way a good affordable hands on project that will provide a financial benefit does. Love you all at Floret so much.

    Reply
  16. Heather on

    This is all so very helpful! I will be doing caterpillar tunnels for the first time this year. Can’t wait!

    Reply
  17. Linda Q on

    Thanks for such great UPDATED information. The video explaining the anchoring details on Bear Mtn link is so much help. I did try in the past to follow the written directions but had a hard time understanding hoe it was done. I only made a 2 short tunnels covered with cloth that I used just for starting and conditioning flowers before they went into the field. I did have rabbits eating the seedlings so I also had to wrap a 2 foot bird netting around the base for when I had the sides of the fabric raised for ventilation. For the frame I used an 8′ length of pvc pipe and 2 foot pieces of rebar. I did purchase the hoop bender from Johnny’s and plan to use it to make the framework for low tunnels directly in the field this year!

    Reply
  18. Catie C. on

    Hi Everyone!
    These past months I have been trying to envision a plan for implementing hoop houses in my growing. What I am most curious about is when to prepare the bed, if you didn’t prepare a bed in the fall (that’s me!!)? I live in VT and our winters can be cold and long. I am wondering if any one has prepared beds in March or April, then planted out, and covered with hoops!

    ps Erin, Thank you so much for your posts, I have been reading them furiously, and they have been so helpful!!!!

    Reply
  19. Terri Bowlby-Chiasson on

    Thank you, Erin for another helpful article… Even the hoop houses are inspiring! I too was wondering what types/varieties of flowers are grown outside all season long? Thanks again!

    Reply
  20. Katie on

    one more thing…. are you planning on doing an article about irrigation?? There are so many different options I am very curious what you use… it looks like drip tape in some of the photos, but is that what you use through the whole farm, and is there a specific way you’ve set it up that has proved less prone to disaster? And what thickness of drip tape have you found lasts the best, or is the best bang for the buck?? Our local grower’s supply says it sometimes only lasts a year. Do you think it is better in the long run to buy something sturdier?

    Thanks so much again for all these articles! I have no doubt the information you have been so freely sharing is going to save us from at least some of the typically newbie mistakes. :) We are so excited and I can’t wait to see what the year will bring!

    Reply
  21. Katie on

    Hi Erin!

    Your timing couldn’t have been better for this article because I’ve been busy this morning calling the local steel dealers for quotes for the 1″square steel tubing for the high tunnels we are wanting to build this spring.

    One question that has come up is why the tubing needs to be galvanized? Is there a specific reason why galvanized tubing needs to be used vs. stainless steel? Wouldn’t the galvanized chip when you bend the tubing??

    Thanks!
    Katie

    Reply
  22. Stephanie on

    Thanks again for sharing Erin! Great post!

    Reply
  23. Cali Walters on

    It looks like a huge portion of your farm is covered at one point or another. What percentage of your flowers are uncovered the whole season in the field and what are some examples? Thank you for all of the information!

    Reply
  24. Jillian Mickens on

    Looks like that link for the Kerr Center Hoop House design isn’t working… Might just be me… Is this the link http://kerrcenter.com/organic-farm/hoop-house/?

    Also do you that the plastic off the “hoopty” tunnels in the winter since they don’t handle snow load? Or do you leave it on and knock off snow it needed?

    Thanks so much! I was definitely hoping you were gonna make this post soon and you did!

    Reply
    • Floret on

      Thanks for catching that–just updated the post with the correct link!

  25. Dani on

    Dang, you even make tunnels look Beautiful! That first shot almost makes my heart as happy as your flower pictures! Thanks for sharing these details and tips!
    ~Dani

    Reply
  26. Natalie Jones on

    Thank you for all you do. Your time is very valuable. And you share so much of it.
    Thank you!

    Reply
  27. Emily on

    Thanks so much for sharing all of this!!! We are finding it hugely helpful. Another cheap tunnel option that we’ve just started using and are pretty chuffed with is the Johnny’s plans for their high tunnels (on their website). We drove straight steel poles over a foot into the ground that the arches (bent with their pipe bender) fit into, so they stand up a bit better in the wind and have more height on the sides, which is handy. We also put the arches closer together so that they can take a snow load – we’ve calculated that they should be able to handle almost anything we get just north of you on the coast here in BC. They cost a bit more, but are still less than $1500 (CDN) for a 50’x12′ tunnel!

    Reply
    • Floret on

      Nice! Thanks for sharing!

  28. Samantha on

    Thanks so much for sharing your tips on hoop houses and all the benefits they have on flower health. It’s astounding how big an impact that protection gives them on their growth! Definitely good to know how much more spacing they need inside as opposed to out in the fields. I am shopping for a small farm in Wisconsin and season extension has been a big part of that conversation, so any information I can get my hands on about hoop houses is much appreciated!

    Reply
  29. Marci Miller on

    We had the absolute pleasure of spending the weekend at the OSU Small Farms/PNW Cut Flower Farmer meet up with Tony and Denise of Bare Mtn Farm. Amazing amount of knowledge and experience between the two of them. And so willing to share, just as you share with us on this blog. We have built all of our own tunnels using the Johnny’s high tunnel bender. We live inNorthern Idaho where winters are snowy/rainy + erratic and windy. We have moved away from the push-up sides like the hoopty and installed wiggle wire and roll up sides. We have placed 3 foot anchors every 8 feet on the house to keep it from blowing away. I am anxious to see what we can do with them moving towards more cut flowers and fewer vegetables inside. Thank you!

    Reply
    • Cali Walters on

      Marci, where are you at in N Idaho? We live in Spokane but love to visit CDA and Sandpoint :)

    • JENNIFER LADD on

      Hello Marci! It was so great to collaborate with you over the weekend at OSU. Thank you for sharing your experiences and advise so honestly and humbly.
      We as well had the great fortune of meeting the lovely, hardworking and generous couple, Denise & Tony, owners of Bare Mtn. Farm at the OSU Small Farmers Conference & PNW Cut Flower Farmer meet up. Both were speakers and aided in giving specifics to this topic and more.
      Between Floret, our OSU extension and the many farmers at the conference we feel like we are more equipped to set out on the mission of season extension, yay!
      Cheers, Jen

Leave a Comment

Floret Farm's Small Plot: Big Impact

Small Plot: Big Impact

Inspiring stories, profiles & advice from 45 flower growers from around the world

Stay in the loop with our updates

Close

Join Us

Join the Floret newsletter and stay in the loop on all the exciting happenings here on the farm

Close